
This post contains affiliate links. I only recommend products I know and love.
As I begin writing this post, I am reminded of the circumstances behind this project I am going to share. We were planning on traveling full-time as a family around the country. We were going to live in a bus and seek to meet people, share Yeshua and Torah, and grow our Homeschooling business.
Well, YHVH had other plans. We ended up only traveling to two locations before God closed that project and opened another… starting a congregation in central Michigan. Needless to say, we had little furnishings for setting up a house. I set out on the task of finding, re-purposing, or building the furniture and decor for our home.
This project was one of the first and cost about $35 to make. It included:
- An outdated entertainment center (These are usually easy to find in thrift stores, on Craigslist, or Facebook marketplace for relatively cheap.) — $10
- Paint (I went and found the cheapest latex flat paint at a box store and chose a color that matched my daughters’ room.) — $8 for a quart
- Black spray paint (I used this as a primer. It does great under colors to make a distressed look when you sand off some of the colored paint. This is not necessary, but it adds some great depth to your project.) — $8 for 2 cans
- Hinges (I purchased four of these for the doors I was making.) — $8
- Used plywood for shelves (I found these on Craigslist for free.) — $0
- 1-2 pallets (I got these for free on Craigslist and broke them down.) — $0
- Polyurethane/furniture wax ( I used this to coat the doors. I usually coat everything in furniture wax, but because of the rustic-ness of the doors, I used polyurethane. I had this on hand because it goes a long way and I had purchased it for other projects.) — $15
- Handles (I purchased 2 of these for the doors.) — $6
- TOTAL —
$35$40-50
So it cost more than I said a moment ago, but it was still a great price for the amount of storage it provides for my two older daughters.
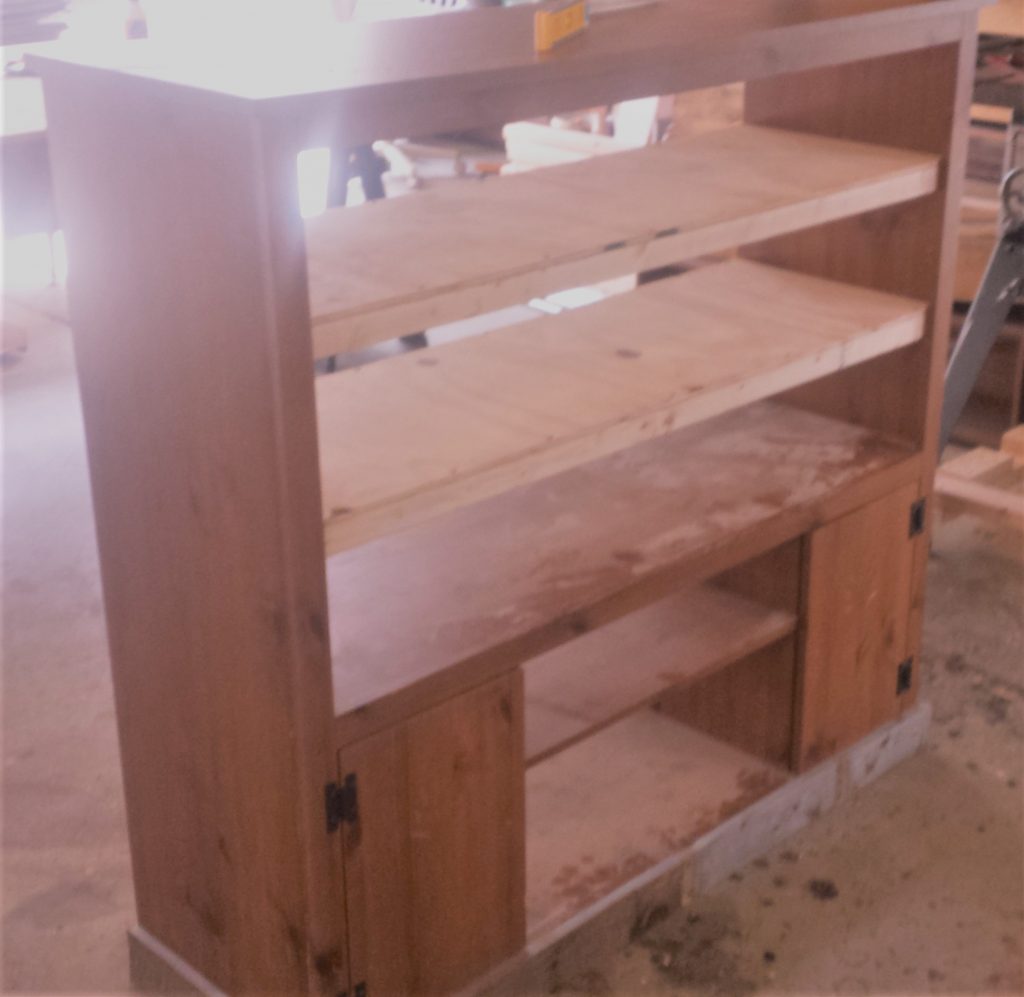
Step 1 – Take off all the doors, shelves, backing, and hardware.
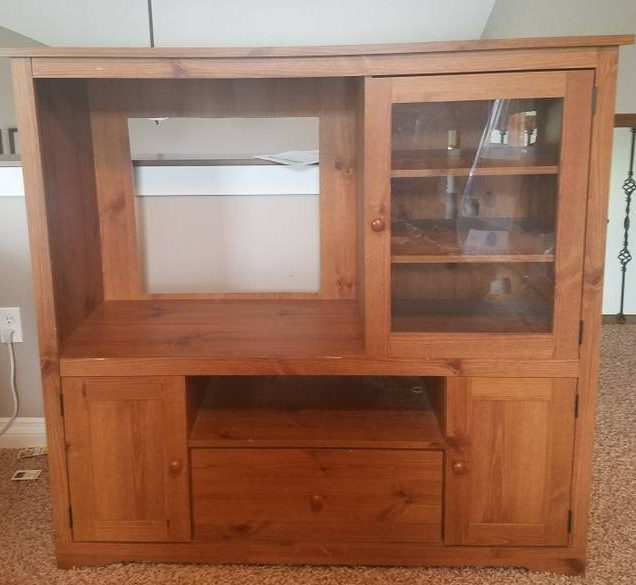
This step allows you to get down to the bones of the project and makes it easier to paint the separate parts and get a better finish. (BTW, the picture below is not the entertainment center I used, but it is similar. I didn’t have any before hand pictures of the one I redid, so I found this one that is similar online.)
Step 2 – Sand all the parts.
Seeing as my entertainment center was made of particle board and had a veneer coating over the top, I chose to sand it. This gets rid of the shiny finish and also helps to get rid of anything that might cause the paint to not adhere to the project.
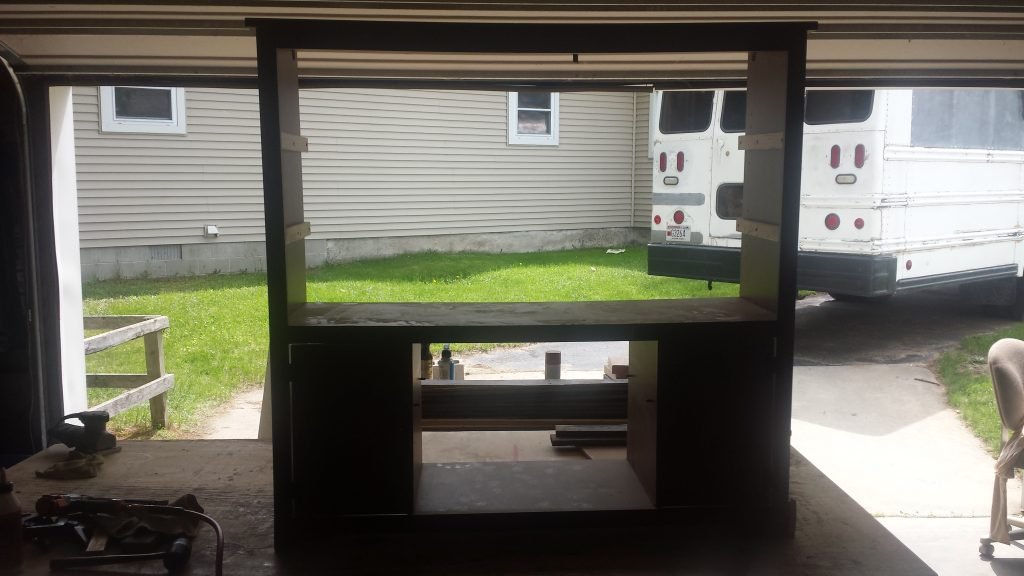
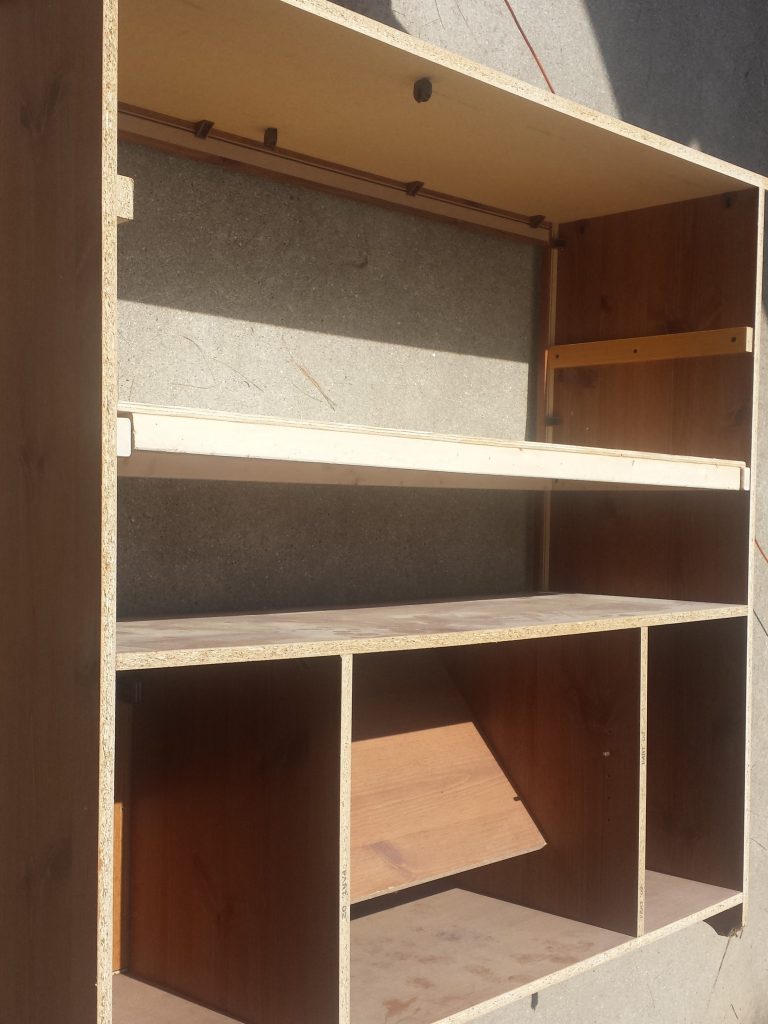
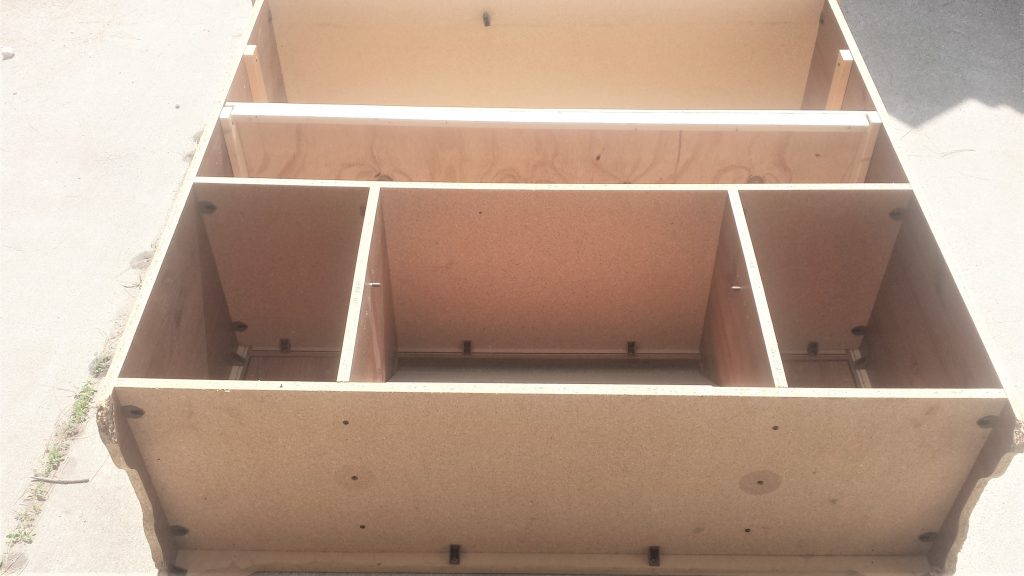
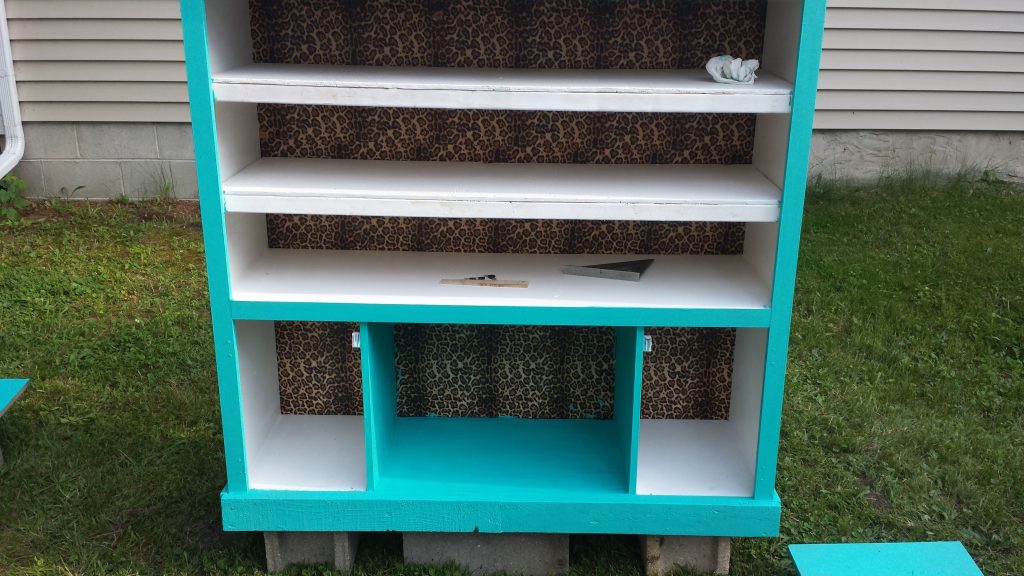
Step 3 – Build the shelves into the large open part.
To do this I had to cut out the center divider to make one large area for shelves.
- I cut pieces of 1×2 for the sides which would be the supports for the shelves.
- I measured the distance I wanted between each shelf, marked that measurement, and clamped the pieces so that the top of the 1×2 would be on the mark.
- Then I drill small holes into the wood and used wood screws to attach them to the frame. It is also beneficial to use a counter-sink bit, if you have one, to keep the board from splitting when you screw it on. Make sure that your screws are short enough that they will go through the 1×2 and into the frame of your project, but not long enough to go through. I used 1 1/4″ wood screws.
- Also I added some pallet trim to the bottom of the piece. This was to hide the broken sides of the original particle board. I think this turned out looking great. I just glued and tacked it on with a brad nailer.
Step 4 – Enlist a helper.
This is often an important step and brings another level of fun. 🙂 I believe there were some serious blueprints being discussed on that piece of paper in my assistant’s hand.

Step 5 – Wipe down the project and begin painting.
Use a lightly damp cloth, and wipe down all parts of the piece. Prepare your paint for the project.
I used a low VOC latex paint that I made into DIY chalk paint. I use the Plaster of Paris recipe for making my chalk paint.
This includes:
- 3 parts paint
- 1 part plaster of paris
- water to mix
To make DIY chalk paint, make a smooth paste with the plaster of paris and water before mixing it into the paint. When mixed well, it will have a smooth consistency.
Application of the DIY chalk paint is fairly comparable to brand name chalk paint.
If you don’t finish your project in one day, it will thicken a little. It will appear a little grainy. Just re-stir and mix the paint again. If needed, add a little more water. Store the left over paint in a glass jar, such as a mason jar, or a plastic tub like a sour cream container.
My thoughts on this DIY chalk paint recipe:
- Time Involved – Easy to find Plaster of Paris on-line or at any box store. 3-5 minutes to measure and mix with the water and paint.
- Application – It works great and applies like brand name chalk paint.
- Adhesion & Coverage – Great! Used black flat primer for a layered chippy effect, but priming is not necessary. Applied 2 coats for compete coverage.
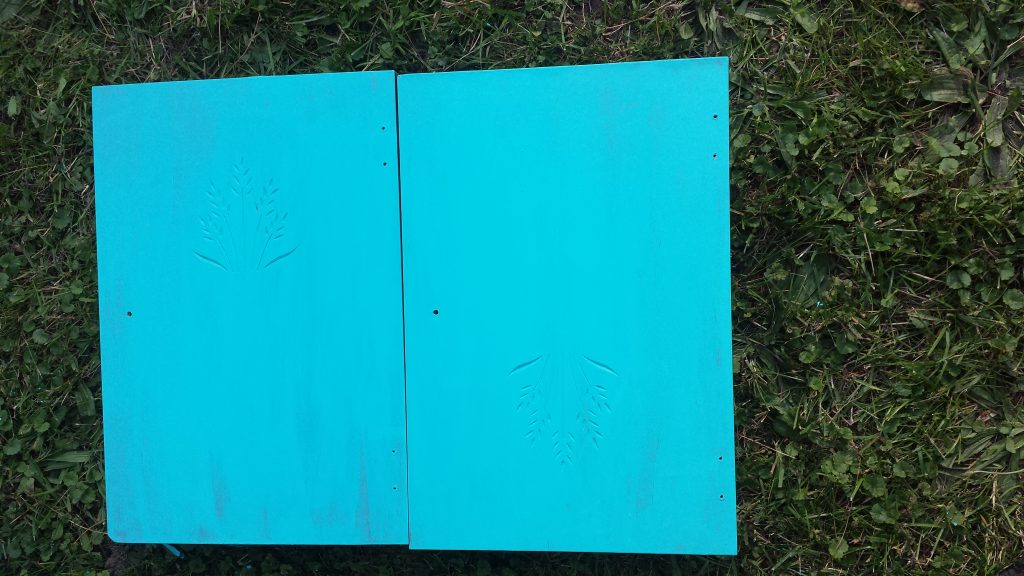
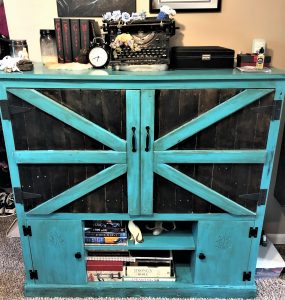
Step 6 – Construct the doors.
- Measure the width and length of the opening .
- Lay out the pallet wood so that it covers the front of your piece, making sure that it divides evenly into two sides for the two doors.
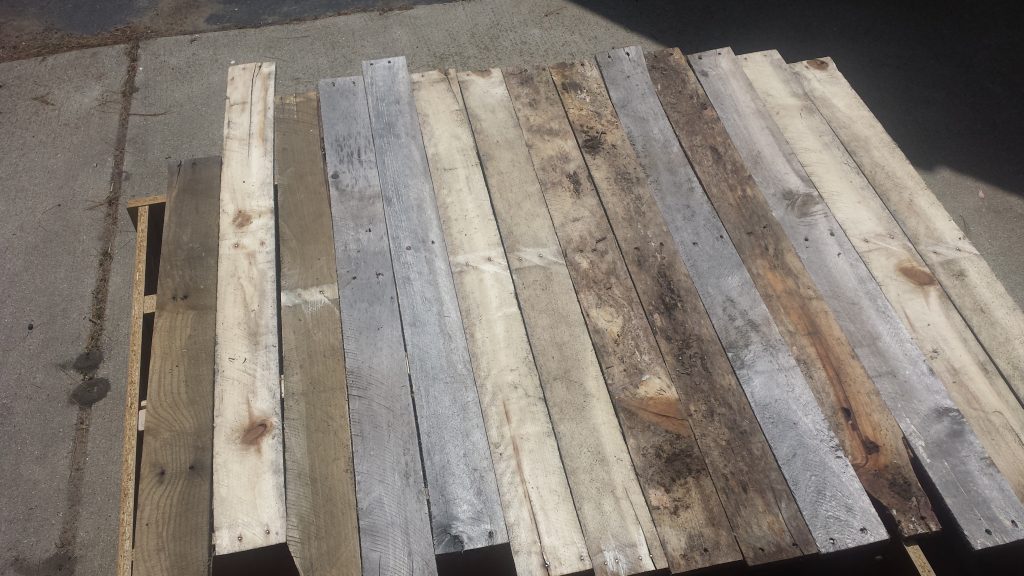
- Cut your pallet wood to the desired height.
- Using a palm sander, sand the pieces of pallet wood to the desired texture. I choose to sand mine using 80 grit, then 120 grit, and finishing with 22o grit sand paper. The larger the grit means the finer and smoother the finished product will be. However, the higher the grit also means that the sand paper will wear out quicker. Therefore, make sure to use the various grits and you will use less sand paper on the project.
- Wipe down the wood and apply your desired finish. As you can see, I chose to stain them. I used Miniwax stain in “Jacobean” as my daughters wanted a darker, rich stain for the furniture in their room.
- Next, measure the two middle decorative boards and cut these to the same height as the doors. Lay these on the two doors. Now measure the middle cross board for each door. This will be used to attach all the boards together.
- Once cut, lay it on the boards so that it is directly in the middle. An easy way to do this is to find the center of the side of the doors and make a mark. Next find the center of the cross board and place a mark on each side of the board. Now lay the cross board so that each mark on it lines up with the marks on the sides of the doors.
- Using some clamps, clamp the cross board and the middle decorative boards to the boards that make the door.
- Now lay a board diagonal across the two doors and mark where it intersects the edges of the doors and the middle decorative boars. Using either a miter saw or a jig saw, cut out these diagonal cross pieces. Place them on your doors and test the fit of each of them to the cross board and middle decorative board.
- Once assured of their fit, take all the decorative boards off of the doors and paint them. Once the paint is dry, sand the painted area to achieve a worn look. Sand gently along the edges and areas where wear would naturally occur.
- Then run a bead of glue along the back of each board, starting with the two middle decorative boards. Glue these on and clamp. Use a brad nailer to take them down as the glue holds. Continue next with the cross boards making sure to tack the board down to each of the boards making up the door.
- Finally finish off with gluing and taking the diagonal boards to the door.
Step 7 – Applying the decorative wax.
Upon assembling the doors and the glue drying, it is time to apply the dark decorative wax to the piece.
- Start with just a small amount on either a rag or a wax brush and dab into onto a small area.
- Using another rag, wipe off much of the wax and buff it to the desire look.
- Continue to do this to the doors and the exterior of the piece.
- Allow this to dry.
- A last optional step is to coat the piece and all its parts with a few coats of polyurethane. I did this to help lesson the wear on the paint from excessive use.
Step 8 – Hang the doors.
- Using a pencil, make a mark on the doors where you would like the hinges to attach. I measured down far enough that the hinge would not interfere with the diagonal trim.
- Once you have decided how far down you want the hinge (mine are about 4 1/2″ from the top of the door), make a mark for the top of the hinge.
- Set the hinge on the door, making sure it is square with the edge of the door and mark the holes for the hinge.
- Using a small drill bit that is smaller then the thickness of your screws, drill out the holes you marked.
- Using a screw driver, attach the hinges.
- Repeat these steps for each of the four hinges.
Once the hinges are attached, mark down 3-6 inches depending on your preferences and make a mark for attaching the knob or pull you chose as a handle for the door. I chose a simple rustic pull (handle) for mine. Attach both of these before hanging the doors as it makes it much easier to attach them.
Now place a door upon in the opening so that the door has about an 1/8″ clearance.
- Get some wood shims or small pieces of folded paper or cardboard and place them at the bottom of the door at the desired height. You can also do the same with shims on the side where it meets the cabinet and on the top. In essence you want the shims to hold the door straight and in place while you attach the hinges to the side of the cabinet.
- Once it is straight and held in place, push the hinge onto the frame and mark where the holes the holes for the hinge.
- Drill out the holes and screw them onto the frame.
- Repeat these steps for the second door.
Step 9 – Attach backing.
For the back, use a piece of luan (also called underlayment at home improvement stores).
- Measure the back from side to side and from the top to the bottom.
- Using a straight edge or square, mark lines to fit the measurements for the back.
- Cut out the back using a jigsaw.
- Paint, stain, or paper the backing. I used wrapping paper and decoupaged it onto the backing.
- Attach the back using finishing nails or a brad nailer.
Once this is attached, you have a completed lovely piece of custom furniture that you can use for storage as a dresser, as a hutch/sideboard for dishes and linens, or as a food pantry.
I hope this project inspires you to redo a piece of furniture in your home, or to seek out a sad, lonely piece of furniture elsewhere that needs some love to be revitalized and improve the beauty of your home.

Leave a Reply